Realtime Bank for Finland - User Guide
Table of Contents
Setup
Setup Azure Storage Connector
First setup Azure Stotage account and setup containers.
Open Setup Azure Storage Connector page in Business Cental and enter following information:
| Field | Description |
|---|---|
| Account Name | Enter account name. |
| Shared Key | Inser account key. |
| Input Container Name | Name of the Azure Stotage container for receiving bank statemenst. |
| Output Container Name | Name of the Azure Stotage container for outgoing bank payment files. |

Test connection
Setup Bank Account
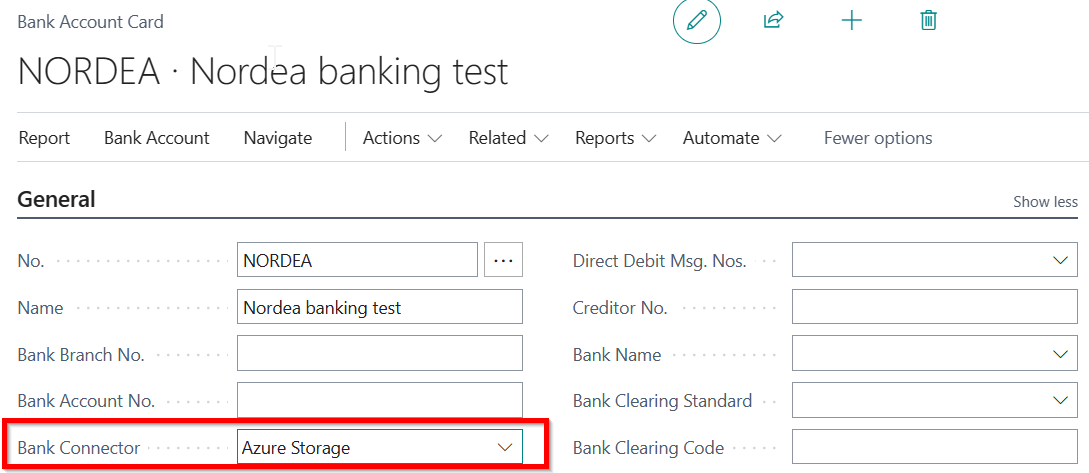
Open Bank Account card and choose the connector in the Bank Connector field.

Setup Realtime Bank
Open Realtime Bank Setup and assign the number series for the Posted Transaction Nos. field.
Incoming Bank Messages
Get bank messages automatically
To get bank messages press the button Get New Bank Messages or setup Job Queue Entries on the bank connector setup page.
The process imports new bank statements to the page Incoming Bank Messages. This page is opened with filters: Source and Status.
Use the “Show all Messages” to see all entries.
Import bank statement manually
You can manually import the bank statement file on the Incoming Bank Messages page by clicking the Import From File button. The entry is in the Received status.
To process the file click Process button.
Then click “Show All Messages” and choose the line.
You see the status – Processed and No. of Saved Transactions.
By pressing this number it is possible to go to the Bank Account Transactions.
Processing Bank Account Transactions
Bank Account Transactions
In Bank Account card there is a new field Balance in Bank. Drilldown in this field to open Bank Account Transactions. By default you can see unposted transactions which need to be applied before they can be posted.
Applying Service Fees
You can use Text-To-Account functionality or describe the G/L account corresponding to the Transaction Code.
Click on the Transaction Code field in the fast box Bank Account Transaction Details. Enter the new line with bank transaction code and G/L Account.
Then go back to transaction and press the Apply Automatically button. The Application status is changed to High Confidence.
You can apply one or more transactions at once.
Applying Invoices
Appying can be done either manually or automatically.
For manual application, assign Applied Account No. and click Apply Manually. This will open the list of open ledger entries. Apply entries by clicking Process->Set Applies-to ID.
For automatic application run the action Apply Automatically.
Posting
Applied transaction can be posted to ledger entries by clicking Post action.
In addition Job Queue Entry can be configured, which posts transactions automatically when transaction has been applied and Application Status (quality) is ‘High Confidence’.
Contact Information
For more information and pricing please contact:
https://apps.itera.ee/docs/en-us/support